


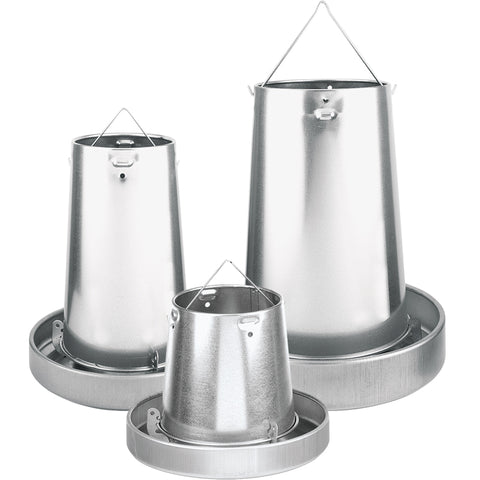


Compared to metal feeders we’ve used in the past, we like the heavy-duty metal construction, quality galvanization and clever adjustment method. Use free standing or by hanging using built-in handle.
Common Uses
For feeding the flock, from broilers to layers. Waterfowl friendly too!
Specs
| 11 lb Capacity |
22 lb Capacity |
44 lb Capacity |
|
|---|---|---|---|
| Item # | 540055 | 540056 | 540067 |
| Dimensions | 13" W 10" H |
13" W 16" H |
15.75" W 18" H |
| Pan Depth | 2-1/4" | 2-1/4" | 3" |
| Suited For | adults | adults | adults |
| Number Fed* | 44 | 88 | 176 |
| Hopper Lid | optional | optional | no |
| Feed Saver Grill | optional | optional | optional |
| Anti-Soil Trough Guard | no | optional | no |
| Rain Hat | no | optional | no |
Benefits
- Heavy-duty galvanized metal construction
- Feeds a wide variety of food stuffs: Crumbles, wheat, barley and cracked corn
- Quickly adjusts between (3) options to control feed output
Accessories (sold separately, colors may vary)
- Hopper Lid prevents birds from perching and soiling feed in the hopper. Can be used outside, but will not protect the feeding trough from rain. Available for the 11 and 22 lb capacity feeders.
- Feed Saver Grill reduces wasted feed. Available for the 11, 22 and 44 lb capacity feeders.
- Anti-Soil Trough Guard protects feed in the trough. Affectionately called the “crap-flap” by Premier’s staff. Fits 22 lb feeder.
- Rain Hat protects both the hopper and feeding trough from the elements. Available for the 22 lb feeder.
How to Use
To hang, attach a carabiner clip to built-in handle. Or, elevate feeder using bricks or blocks.
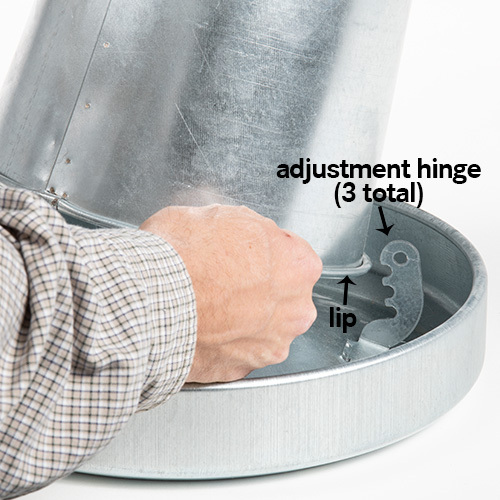
To adjust feed output, release one locking clip toward the trough and lower hopper to the desired height. Repeat for each clip. Reverse to raise.
How to attach cone to base:
1. Tilt cone base into two of the locking clips.
Lip of the cone should fit into topmost notch of locking clip.
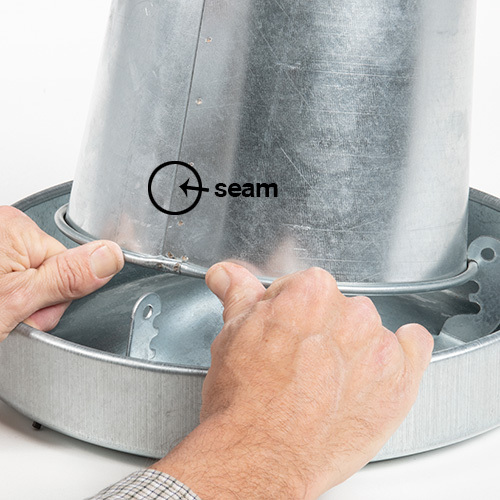
2. Rotate hopper until verticle seam aligns with empty clip.
Push on base of hopper while pulling on the trough. This counter pressure allows the lip to fit into the third locking clip.
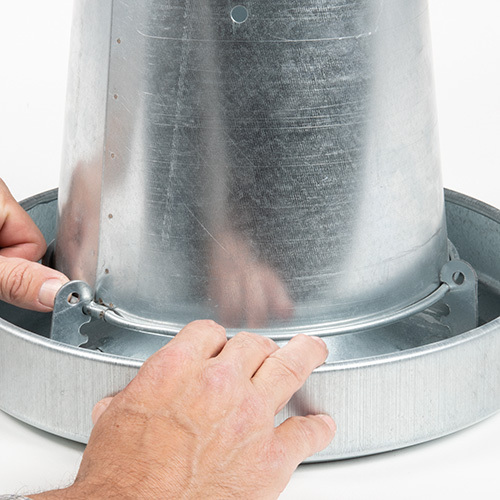
3. Adjust lip to desired height.
Feed output can be controlled by moving lip to alternate notches in locking clip.
Precautions
We DO NOT recommend the use of the Feed Saver Grill with roosters or hens that have large combs. The comb could rub on the plastic and become injured. Best for layer flocks with small combs.